Perfect Claude Code Notifications Setup with Tailscale and ntfy
· 7 min readIf you’re like me and have been hooked into running Claude Code on your phone, running several sessions in parallel like Boris, you may have noticed that it is easy to lose track of what is going on across all those sessions. You may go away for a sec, distracted by Minecraft parkour videos and forget that Claude is waiting for your input.
Idea
Claude Code comes with a notification hook. Some terminals support it natively (iTerm2, Kitty, Ghostty) but most don’t, and even when they do, it’s a system notification which is easy to miss if you step away.
The idea is to get a phone notification when Claude Code needs your input. I considered a few options, and I ended up choosing ntfy as the notification provider.
To make sure that everything stays private, I decided to host ntfy on my machine and use Tailscale as my private network.
I was also tired of dealing with bash scripts. I kept running into compatibility issues between Mac, Linux and Windows, so I built a small tool to solve that (but you can still use bash).
Requirements
The only thing you need is a Tailscale account and Docker for that. If you want to go with bash, it helps to have jq installed.
Step 0: Project Structure
Here are the files you’ll need:
my-infra/
├── .env
├── compose.yml
└── config/
    └── ntfy.json
Step 1: Configure Tailscale ACL
Go to the ACL editor and add a tag:container tag:
"tagOwners": {
  "tag:container": ["autogroup:admin"]
}
Step 2: Create an OAuth Credential
Go to Trust & Credentials to generate a new OAuth credential.
- Click Credential → OAuth
- Grant
auth_keysscope with write permission - Select tag
tag:container - Copy the client secret (
tskey-client-...)
OAuth works better because the regular auth keys expire in 1–90 days. OAuth client credentials don’t expire and the container re-authenticates automatically on restart.
Now add the OAuth key to your .env:
TS_AUTHKEY=...
Step 3: Docker Compose
Your compose will look like below. It uses the tailscale/tailscale and binwiederhier/ntfy images and relies on Tailscale sidecar pattern where it exposes your Docker containers as machines in the tailnet. This is useful: you can reach the container by name directly, the sidecar proxies the request, handles HTTPS, etc.
name: my-infra

services:
  ts-ntfy:
    image: tailscale/tailscale:latest
    container_name: ts-ntfy
    hostname: ntfy
    restart: unless-stopped
    environment:
      - TS_AUTHKEY=${TS_AUTHKEY}?ephemeral=false
      - TS_EXTRA_ARGS=--advertise-tags=tag:container --reset
      - TS_SERVE_CONFIG=/config/ntfy.json
      - TS_STATE_DIR=/var/lib/tailscale
      - TS_USERSPACE=false
    volumes:
      - ts-ntfy-state:/var/lib/tailscale
      - ./config:/config
    devices:
      - /dev/net/tun:/dev/net/tun
    cap_add:
      - net_admin

  ntfy:
    image: binwiederhier/ntfy
    container_name: ntfy
    restart: unless-stopped
    command: serve
    environment:
      NTFY_BASE_URL: "https://ntfy.<your-tailnet>.ts.net"
      NTFY_UPSTREAM_BASE_URL: "https://ntfy.sh"
    network_mode: service:ts-ntfy
    depends_on:
      - ts-ntfy

volumes:
  ts-ntfy-state:
Note the NTFY_UPSTREAM_BASE_URL setting. This forwards push notifications through ntfy.sh’s Firebase/APNs infrastructure for instant mobile delivery. Without it, notifications can be delayed by minutes or hours.
Step 4: Tailscale Serve Config
config/ntfy.json — this tells Tailscale to proxy HTTPS to ntfy’s port 80:
{
  "TCP": {
    "443": {
      "HTTPS": true
    }
  },
  "Web": {
    "${TS_CERT_DOMAIN}:443": {
      "Handlers": {
        "/": {
          "Proxy": "http://127.0.0.1:80"
        }
      }
    }
  }
}
Step 5: Start It
docker compose up -d
Give it ~15 seconds for the TLS certificate to be provisioned. ntfy is now available at https://ntfy.<your-tailnet>.ts.net from any device on your tailnet.
Your tailnet name (the taila2944f part) can be changed to something more readable in DNS settings. Also make sure that “HTTPS Certificates” are enabled.
Step 6: Subscribe on Your Phone
You need to install the ntfy app, available on Google Play and the App Store. Once installed you need to subscribe to a topic with your server URL. For example:
- Add
claude-codeas the topic - Choose the custom server:
https://ntfy.<your-tailnet>.ts.net
You can make a quick test with:
curl -s -H "Title: Test" -d "Hello from the terminal!" "https://ntfy.<your-tailnet>.ts.net/claude-code"
Step 7: Claude Code Hook
Now wire up Claude Code to send notifications through ntfy. You have a few options:
Option 1: claude-notifier
This is the tool I built to solve that: claude-notifier. It handles multiple notification channels, sending to ntfy but also to native system notifications (in Mac, via terminal-notifier).
Install it:
brew install felipeelias/tap/claude-notifier
Generate the config:
claude-notifier init
This creates ~/.config/claude-notifier/config.toml. Point it to your ntfy server:
[[notifiers.ntfy]]
url = "https://ntfy.<your-tailnet>.ts.net/claude-code"
title = "Claude Code ({{.Project}})"
Then add the hook to ~/.claude/settings.json:
{
  "hooks": {
    "Notification": [
      {
        "hooks": [
          {
            "type": "command",
            "command": "claude-notifier"
          }
        ]
      }
    ]
  }
}
Same binary and config on every machine. Run claude-notifier test to verify it works.
Option 2: Bash script
You can still go with a bash script if you want. Create ~/.claude/hooks/notify.sh:
#!/usr/bin/env bash
set -euo pipefail

# Convert backslashes for Windows path compatibility
INPUT=$(cat | tr '\\' '/')
PROJECT=$(printf '%s' "$INPUT" | jq -r '.cwd // empty' | xargs basename 2>/dev/null || echo "")
HOOK_TITLE=$(printf '%s' "$INPUT" | jq -r '.title // empty')
MESSAGE=$(printf '%s' "$INPUT" | jq -r '.message // "Done"')

if [ -n "$HOOK_TITLE" ]; then
  TITLE="$HOOK_TITLE"
elif [ -n "$PROJECT" ]; then
  TITLE="Claude Code ($PROJECT)"
else
  TITLE="Claude Code"
fi

curl -s \
  -H "Title: $TITLE" \
  -d "$MESSAGE" \
  "${NTFY_URL}/claude-code" > /dev/null 2>&1 || true
Make it executable (chmod +x ~/.claude/hooks/notify.sh) and add to ~/.claude/settings.json:
{
  "env": {
    "NTFY_URL": "https://ntfy.<your-tailnet>.ts.net"
  },
  "hooks": {
    "Notification": [
      {
        "hooks": [
          {
            "type": "command",
            "command": "~/.claude/hooks/notify.sh"
          }
        ]
      }
    ]
  }
}
This requires jq (brew install jq, apt install jq, or winget install jqlang.jq).
Putting it all together
If everything’s working, you should see this:
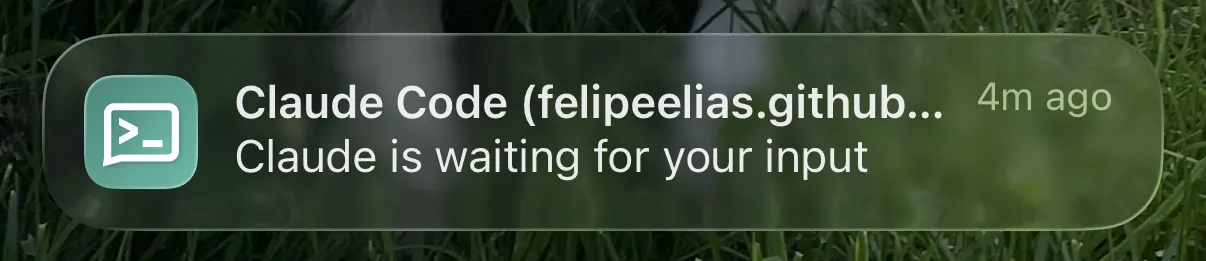
Troubleshooting
If the notification says “New message”, make sure that all devices (including your phone) are on the same Tailscale network. If they are and you’re still not getting notifications, you can always ask Claude to help you debug it.